

Creating memories with our little ones and making holidays feel extra special is one of our favorite things to do. Coloring Easter eggs is a fun tradition and activity to do with little ones in the Spring. There are many ways to color Easter eggs but we used whipped cream this time for a fun and tasty activity.
Using whipped cream for Easter egg coloring is so easy, and a super effective way to dye or decorate Easter eggs for your home.

The first step in any Easter egg dying activity is to boil your eggs. We used our Dash egg to boil our eggs. They will need to be at room temperature to begin. Once our eggs were at room temperature, we let them sit in vinegar for about ten minutes and dry. This step will help turn the colors brighter and bolder.

Next, we placed about three spoonfuls of whip cream into a cupcake container for each egg. Our little ones enjoyed some whipped cream during this time! Then we added food coloring and mixed colors slightly. We then placed an egg in each container of the tray with whipped cream and using a spoon (and our hands) made sure the egg was entirely covered.


Let the eggs sit in the whipped cream for at least 30 minutes, the longer you leave them there the bolder the colors will be. Once you are ready, run the eggs under cool water and dry. Now it’s time to enjoy the beautiful colors and use your Easter eggs to decorate around the house!


We also made some easy handprint chick cards to wish family a Happy Easter. This activity is easy and requires only a few materials…paint, paper, googly eyes and feathers.

Coat your little one’s hand with a layer of yellow paint (or the color your little one’s choose) and make a handprint on a white card stock paper, be sure to hold your little one’s hand down and fingers still to make the handprint. Be sure to wipe and wash hands immediately to avoid little hands touching everything.

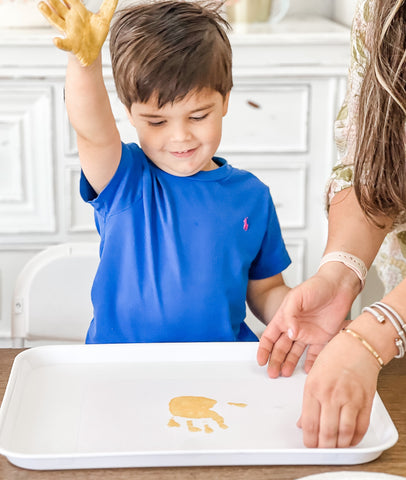


While you wait Let the handprint dry, cut a small triangle using orange cardstock for your chick’s nose (you can also paint the nose). Next, glue your googly eyes and feathers on each side of your chick as wings.


Lastly, write Happy Easter or any other Springtime message you’d like to send to a family member or friend.
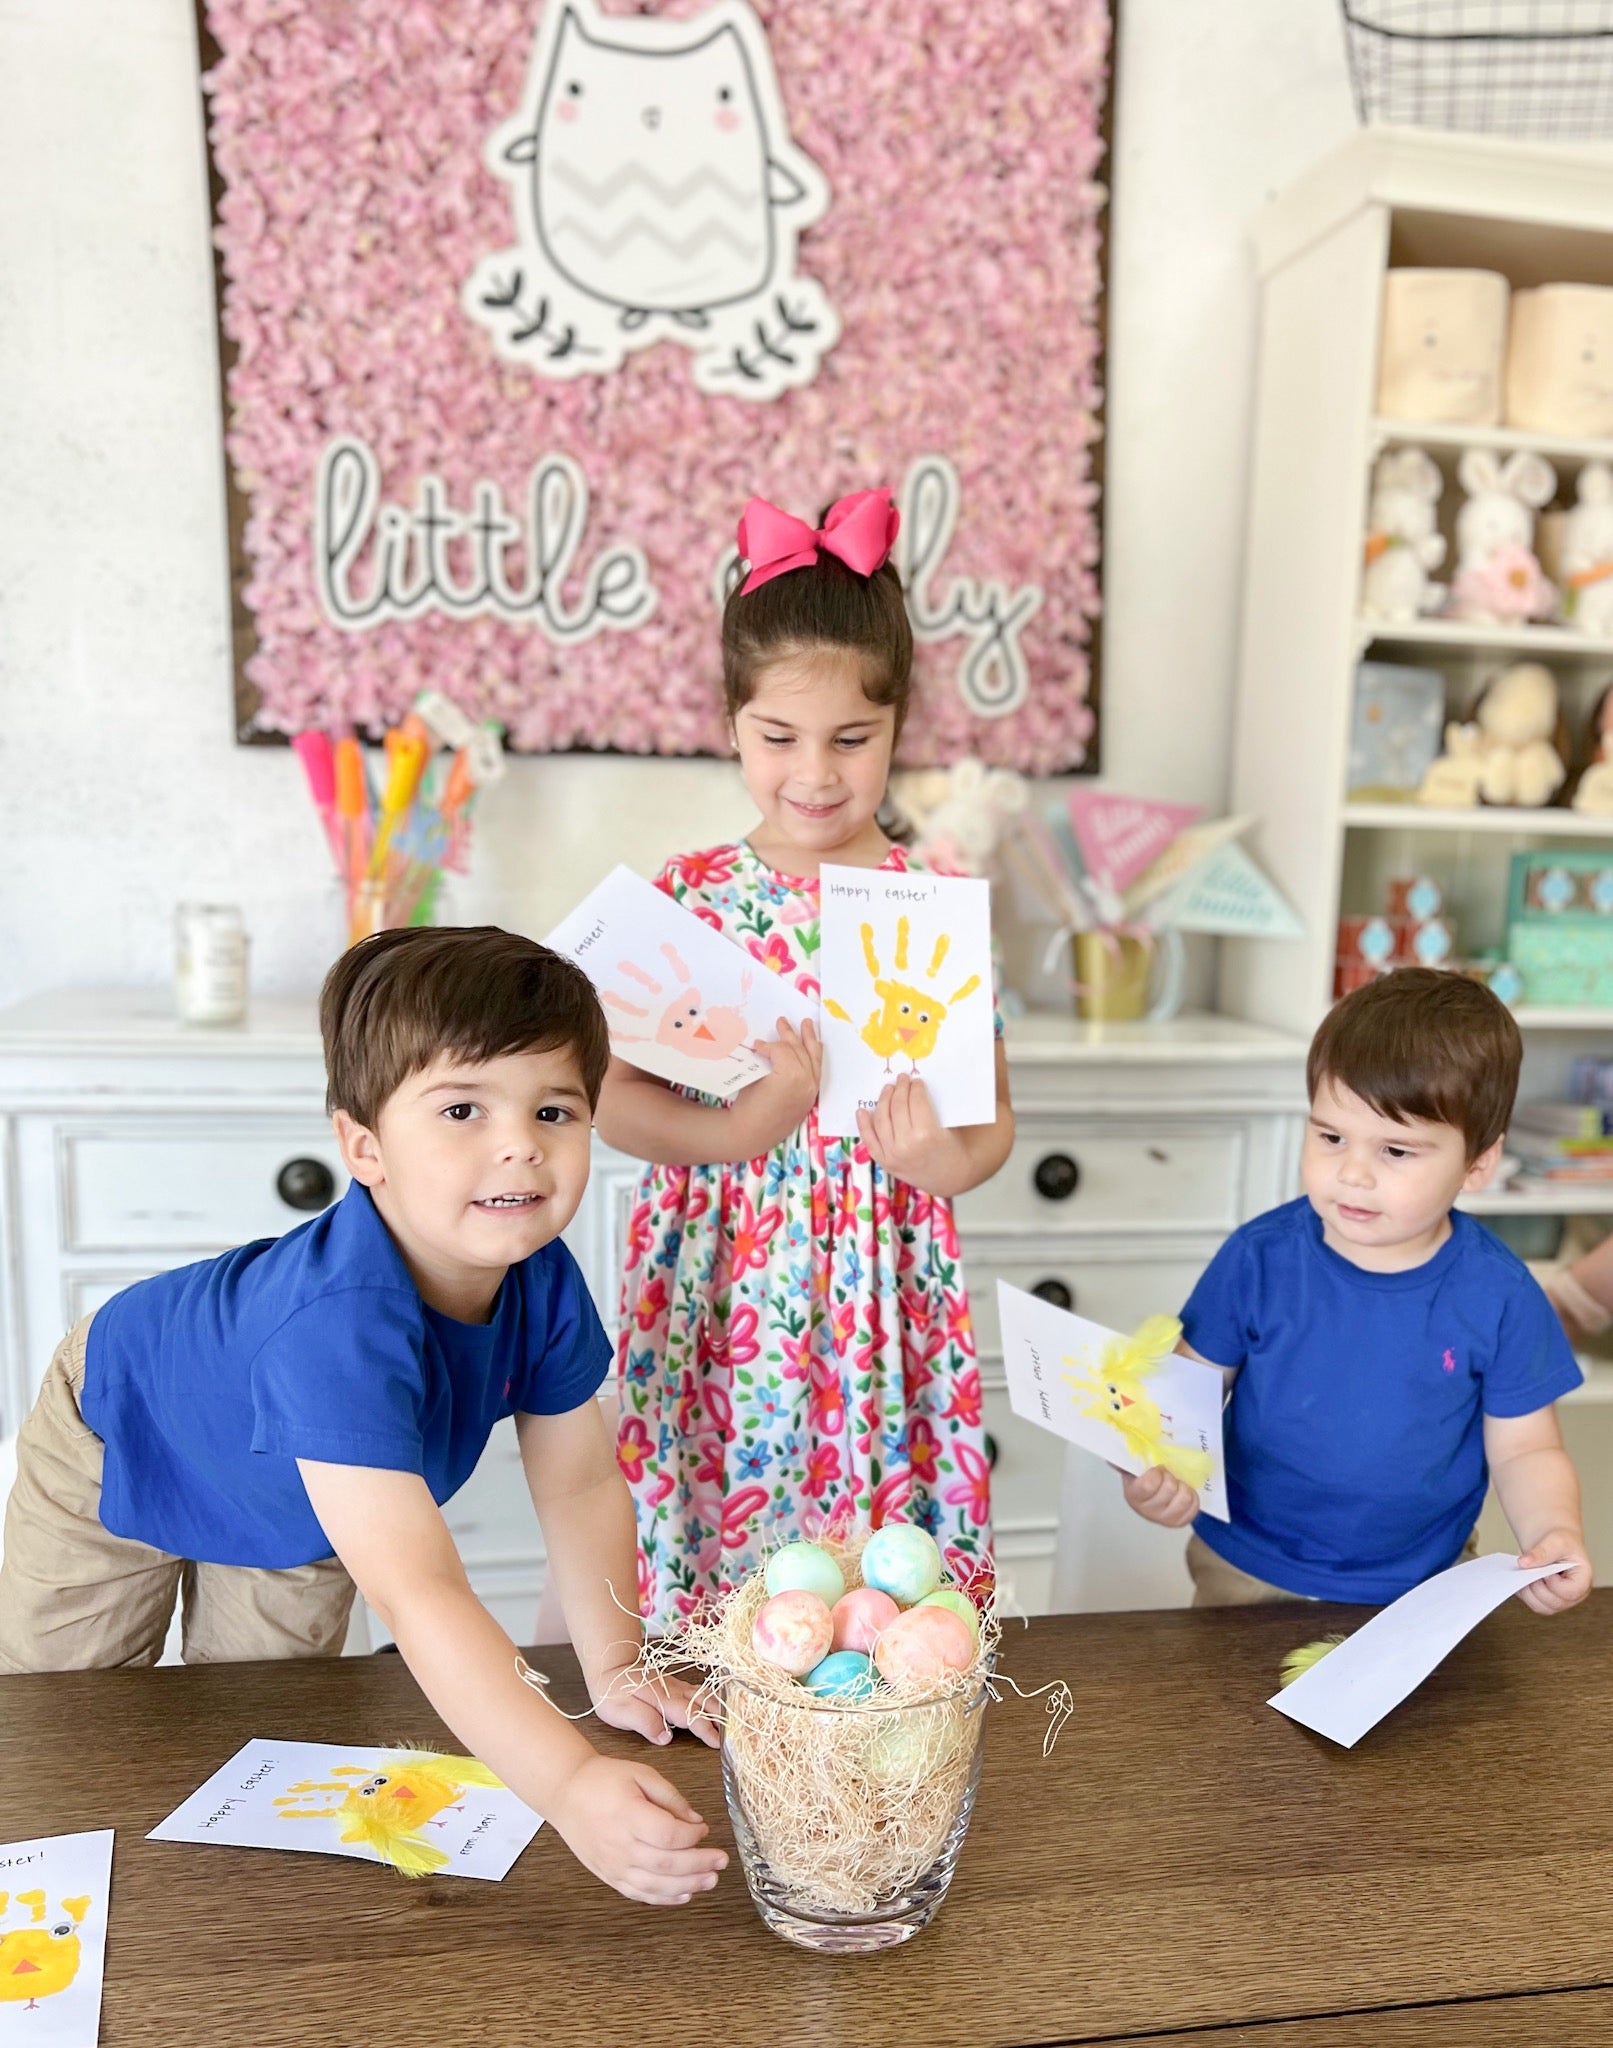
We truly enjoy these activities with our little ones and sharing these moments…hope you’re inspired to do so too!
Easter Egg Coloring and Handprint Chick Cards - What You'll Need
Easter Egg Coloring
- Whipped Cream
- Food Coloring
- Eggs
- Cupcake Tin
- Spoon
- We used our Dash Rapid Egg Cooker (linked here) to boil the eggs
Steps
1. Boil eggs. Let them completely cool.
2. Place boiled eggs in vinegar and let sit for ten minutes.
3. Place whipped cream in cupcake tin. Add food coloring to whipped cream. You can combine colors in the container or only use one color in each. If you are combining colors, gently mix them.
4. Place eggs in whipped cream and using a spoon cover the eggs entirely with whipped cream. Let sit for at least 30 minutes, could be longer (the longer you let them sit the more their colors will intensify).
5. Remove eggs from tin and run under cool water, pat dry.
6. Enjoy!
Handprint Chick Cards
- Yellow paint (or any color your little one would like their chick to be) (we use this set that comes with 18 colors, linked here)
- Orange and white cardstock paper (set of cardstock in many colors - linked here)
- Googly eyes (we've been using this one that comes in assorted sizes)
- Feathers (we used this set)
- Glue
Steps
1. Coat your little one's hand with paint and have them press their hands firmly on the white cardstock.
2. While you wait for the handprint to dry, cut a small triangle using the orange cardstock that will be the nose for the chick. Glue on the handprint.
3. Glue the googly eyes and then the feathers, one on each side for wings.
4. Write a message on the card such as "Happy Easter!", "Hello, Spring" or any message you'd like.
5. Give to a family member or friend!
Have fun and share with us! #LOCreativeCircle #mylittleowly
*Please note, this post contains affiliate links.* We earn a small commission if you make a purchase through these links.